Custom Intune roles are a great way to provide delegated and restricted access to resources in Intune. For example, you can prevent helpdesk users from wiping managed devices or provide reporting access to members of sales.
In this tutorial, I am going to show you how to create custom Intune roles using the Azure Portal and Microsoft Graph PowerShell.
To be able to run the scripts in this tutorial, you must ensure you have the Microsoft Graph PowerShell module installed. Check out my guide here to learn how.
What are Intune roles?
Roles in Microsoft Intune are groups of specific permissions that can be assigned to users or user groups. The role defines what actions a user can perform in Microsoft Intune and to what devices.
There are many types of roles available, as well as the option to create custom roles containing fine-grained permissions which I am going to cover in this tutorial.
Intune comes with the following in-built roles:
- Application Manager
- Endpoint Security Manager
- Organizational Messages Manager
- School Administrator
- Read Only Operator
- Intune Role Administrator
- Help Desk Operator
- Policy and Profile manager
For a detailed breakdown of each role you can view the role properties from the Microsoft Intune portal:
1. Login to https://intune.microsoft.com/
2. Select Tenant administration from the left-hand menu.

3. Select Roles.

4. Click on the role name of the role permission you wish to view.

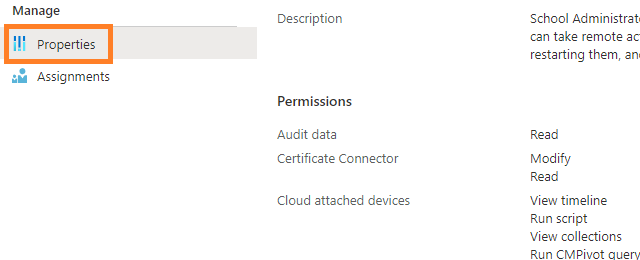
5. Select Properties and on the right-hand side, you will see a list of all permissions grouped with this role.
How to create custom Intune roles using the Intune portal
Let’s take a look at how to create custom roles using the Intune portal. It is convenient to create roles this way if you are creating the role as a one-off and do not need to duplicate the configuration to other tenants.
Start by following steps 1 > 3 in the above section. This will take you to the Intune role page in the admin portal.
- Now you are on the Intune role page, select Create.

2. Enter a name for your custom Intune role.

4. Scroll down the list and enable your desired Intune role actions.

5. Click Next and script the scope tabs page, then click Create.
6. You will now see your custom Intune role on the roles page. Select the Role to open up the properties.

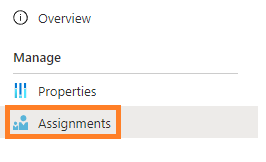
7. From the left-hand menu, select Assignments.
8. Click Assign.

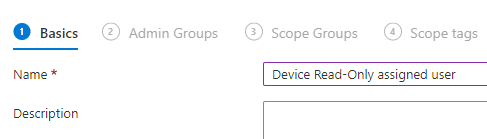
9. Enter a name for the role assignment.
10. Click Add groups and include any groups of users for which you want this role to be assigned.

11. On the scope groups tab I have selected All Devices. In the case of this setting, this defines the objects you want the assigned users to have control over. In this example, I am giving Approval Admins read-only access to all devices.

12. Now click Next, the Next again and Create. You custom role has now been created and assigned.
You can also follow along the steps in my YouTube video.
How to create custom Intune roles using PowerShell
To create your custom role using Microsoft Graph PowerShell, use the below script. Here are the steps to deploy the script:
- Complete the fields next to $DisplayName and $RoleDescription to match your desired settings.
- There are 4 areas in the script which include the value Microsoft.Intune_Organization_Read, you should replace this to include your desired permissions.
- Use the Microsoft Docs permission reference when choosing your desired permissions here.
###
$DisplayName = "My Custom Role2" #Define your role name
$RoleDescription = "My custom role description2" #Define the role description
###

#Import module
Import-Module Microsoft.Graph.DeviceManagement.Administration

#Select beta profile
Select-MgProfile -Name Beta

#Connect to Microsoft Graph
Connect-MgGraph -scopes DeviceManagementRBAC.ReadWrite.All

#Store the URI path
$uri = "https://graph.microsoft.com/beta/deviceManagement/roleDefinitions/"

#Store Json Payload
$json = @'
		{
    "@odata.context": "https://graph.microsoft.com/beta/$metadata#deviceManagement/roleDefinitions/$entity",
    "@odata.type": "#microsoft.graph.deviceAndAppManagementRoleDefinition",
    "displayName": "<rname>",
    "description": "<rdesc>",
    "isBuiltInRoleDefinition": true,
    "isBuiltIn": true,
    "roleScopeTagIds": [],
    "permissions": [
        {
            "actions": [
                "Microsoft.Intune_Organization_Read",
            ],
            "resourceActions": [
                {
                    "allowedResourceActions": [
                        "Microsoft.Intune_ManagedDevices_Read",
                    ],
                    "notAllowedResourceActions": []
                }
            ]
        }
    ],
    "rolePermissions": [
        {
            "actions": [
                "Microsoft.Intune_ManagedDevices_Read",
            ],
            "resourceActions": [
                {
                    "allowedResourceActions": [
                        "Microsoft.Intune_ManagedDevices_Read",
                    ],
                    "notAllowedResourceActions": []
                }
            ]
        }
    ]
}
'@

#Update unique payload information
$json = $json -replace '<rname>',$DisplayName
$json = $json -replace '<rdesc>',$RoleDescription

#Create custom Intune role
Invoke-MgGraphRequest -Uri $uri -body $json -Method POST -ContentType "application/json"
You can apply multiple permissions in your custom Intune role, for example if you wanted include Manage Device Read and Managed Device Update permissions, you would update the Json payload as follows:
$json = @'
		{
    "@odata.context": "https://graph.microsoft.com/beta/$metadata#deviceManagement/roleDefinitions/$entity",
    "@odata.type": "#microsoft.graph.deviceAndAppManagementRoleDefinition",
    "displayName": "<rname>",
    "description": "<rdesc>",
    "isBuiltInRoleDefinition": true,
    "isBuiltIn": true,
    "roleScopeTagIds": [],
    "permissions": [
        {
            "actions": [
                "Microsoft.Intune_Organization_Read",
                "Microsoft.Intune_Organization_Update",
            ],
            "resourceActions": [
                {
                    "allowedResourceActions": [
                        "Microsoft.Intune_ManagedDevices_Read",
                        "Microsoft.Intune_Organization_Update",
                    ],
                    "notAllowedResourceActions": []
                }
            ]
        }
    ],
    "rolePermissions": [
        {
            "actions": [
                "Microsoft.Intune_ManagedDevices_Read",
                "Microsoft.Intune_Organization_Update",
            ],
            "resourceActions": [
                {
                    "allowedResourceActions": [
                        "Microsoft.Intune_ManagedDevices_Read",
                        "Microsoft.Intune_Organization_Update",
                    ],
                    "notAllowedResourceActions": []
                }
            ]
        }
    ]
}
'@
Assign members and scopes to Intune Roles with PowerShell
Now you have created the Role, you may notice that there are no assigned admin members or assignment scopes defined. Use the below script to define the role members and an assignment scope.
Update the script as follows:
- Update the $DisplayName field to the desired name of your role assignment
- Update the $AdminGroupName field to the exact name of the group that contains your target members
- Update the $RoleName field with the exact name of the role the assignment is for
###
$DisplayName = "My Display Name" #Define a name for your role assignment
$AdminGroupName = "Approval Admins" #Define the group that contains the user you wish you assign this role to
$RoleName = "Read-Only Device Role" #Define the name of the active role
###

#Import Module
Import-Module Microsoft.Graph.DeviceManagement.Administration

#Select beta profile
Select-MgProfile -Name Beta

#Connect to Microsoft Graph
Connect-MgGraph -scopes DeviceManagementRBAC.ReadWrite.All

#Store role and group information
$Role = Get-MgDeviceManagementRoleDefinition | Where-Object {$_.DisplayName -eq $Rolename}
$admingroup = Get-MgGroup | Where-Object {$_.DisplayName -eq $AdminGroupName} | select id

#Store URI path
$uri = "https://graph.microsoft.com/beta/deviceManagement/roleAssignments"

#Store Json payload
$json = @'
{
"id":"",
"description":"",
"displayName":"<dname>",
"members":["<admgroup>"],
"resourceScopes":[],
"[email protected]":"https://graph.microsoft.com/beta/deviceManagement/roleDefinitions('<roleid>')",
"scopeType":"allDevices"
}
'@

#Update unique payload information.
$json = $json -replace '<roleid>',$Role.id
$json = $json -replace '<dname>',$DisplayName
$json = $json -replace '<admgroup>',$admingroup.id


#Create role assignment
Invoke-MgGraphRequest -Uri $uri -body $json -Method POST -ContentType "application/json"